Like all materials, those used in stained glass do deteriorate. When a window requires releading, these are the steps recommended by national and international standards and guidelines, which Gerry and Jill employ in their studio.
The thumbnail images will reopen in a new window at full size when clicked.
1. INSPECTION AND CONDITION REPORT
 |
The condition of the window is established. The window is inspected for structural stability. Is the window buckled? Have the leads fatigued? Have the solder joins broken? Have the tie wires separated from the reinforcing bars? Has the putty fallen out allowing the window to leak? In a stained glass window the stability of the glass paints is established to ensure that the restoration process is not going to remove or endanger the painted art work. |
A condition report is written along with annotated photographs. The photographs should be particularly clear and detailed as they reveal to the custodian the condition of the windows before work commences. The custodian can then use this preliminary record in the event that the restorer has used any practices which damage, remove the glass paints, or alter the windows in any way during the restoration. A preliminary condition report is the vital first step in a restoration. The report is presented to the custodian along with priorities of works, and estimated costs. |
|
2. REMOVAL OF WINDOW
 |
The window is removed from its surrounds. Sometimes when hard mortars have been used in stone set windows this process is slow and difficult. Removing windows from wooden frames can be comparatively simple. The window is removed and taken to the restoring studio. |
3. IN-STUDIO INSPECTION
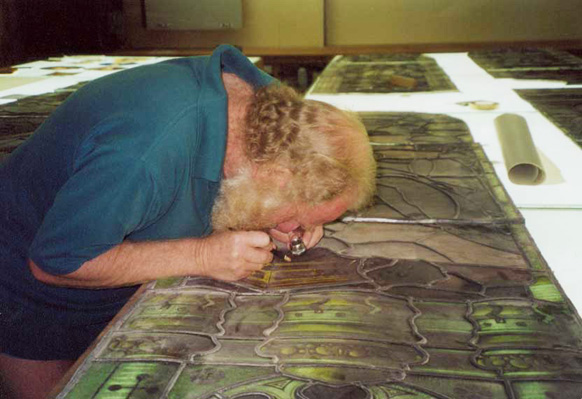 |
In the better lighting conditions of the restoration studio the window is inspected under a magnifying lens. This is done to confirm observations during the original on-site inspection, and to see if any existing defects in the window can be remedied by using better materials or improved reinforcing systems. |
4. DISMANTLING
 |
The window is dismantled. The old leads are recycled, after specimen leads have been labelled and stored. At this stage the window is reduced to its component glass pieces. |
In large restorations there may be several thousand pieces of glass, which require a methodical and exacting approach to ensure all the pieces remain in their correct position. In this photograph the removed pieces are placed in order on the bench in the background. |
|
5. CLEANING – REMOVAL OF PUTTY
 |
As the glass is removed from the leads, old putty is still stuck to the front, back and edge of the glass. This putty is very carefully removed by the slow, exacting and tedious method of scraping it off with a blade from every one of the hundreds or thousands of pieces of glass. This is to ensure that the glass, and particularly the glass paint, is not damaged. |
| Shortcut “cost effective” methods such as ”dipping” (a trade euphemism for soaking in a bath) the window in caustic soda to remove the putty are universally condemned as the caustic soda also attacks and removes or damages the glass paints. Custodians who employ studios who use “dipping” to save money have probably irredeemably ruined their stained glass window. | |
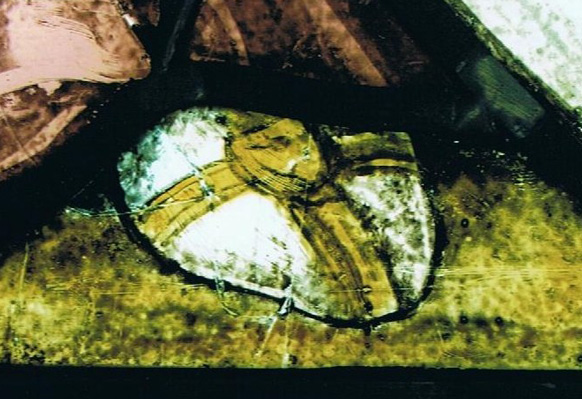
6. CLEANING – DIRT FROM GLASS
As dust, grime and soot accumulates on the surface of windows it obviously dulls the amount of light coming through the glass. It also has a more deleterious effect because moisture is attracted to the dirt, which, in turn, can accelerate the deterioration of the glass paints. Great skill and care is required particularly in cleaning the paints in stained glass windows. The principal method is the use of de-ionised water applied with cotton swabs and done on a light box. The glass is frequently inspected under a magnifying lens to ensure no damage is being done to the glass paints. |
|
 |
This photograph shows an experimental clean of an area of dirt from an 1870s John Hardman (UK) stained glass window in transmitted light. |
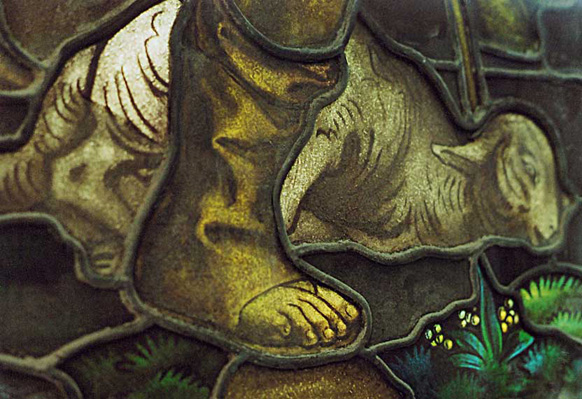
7. RETAINING ORIGINAL DAMAGED GLASS
Wherever possible, the original glass is retained. This is particularly important in stained glass windows where the original studio’s painters have used an idiosyncratic style, which is difficult to reproduce. |
|
 |
This image shows a broken piece that has been cleaned and edge glued using conservation grade epoxy resin. There is a new piece of glass which has been painted and stained to match the 16th century glass painting techniques used in the window. It has been edge glued to the original glass in the shoe. |
8. REPAINTING LOST OR SHATTERED GLASS PIECES
Sometimes it is not possible to retain damaged glass. In these instances Gerry and Jill have a wide range of (sometimes out of production) glass paints, stains and enamels, painting mediums, and traditional glass painting brushes which allows them to faithfully reproduce the colours and painting styles used by the original studio. Sometimes this requires using rare centuries old glass painting techniques. Part of Gerry and Jill’s Churchill Fellowship Stained Glass Restoration tour of the US, UK and France was to learn these “long forgotten” techniques. |
|
 |
This photograph shows repainting a broken 1920s face in their studio. The new face on the right has had only two of the seven layers of glass paint required to faithfully reproduce the process and style used by the original studio. |
9. RELEADING
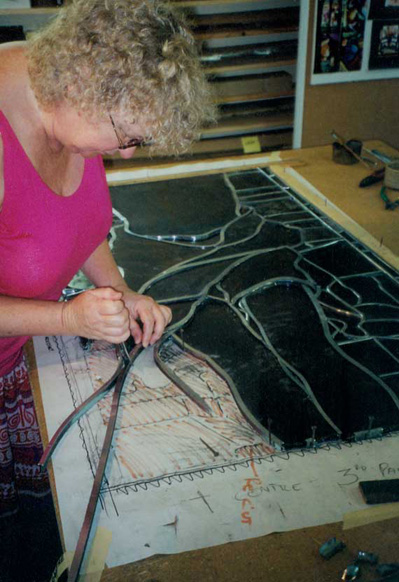 |
With the glass pieces cleaned of putty and dirt, the broken pieces re-glued, and any lost or shattered pieces repainted, the window can now be releaded. Exactly the same sized lead profiles as were used by the original studio are used as these form an integral part of the aesthetic of the window. Rare or unusual leading techniques used by the original studio are noted before dismantling, and are carefully reproduced. |
Gerry and Jill use specially alloyed leads, which comply with international standards and guidelines. These leads prevent premature breakdown and buckling. A releaded window should last for a century or more before needing its next restoration. Some European Gothic windows have been releaded many times, and large cathedrals have their own stained glass conservation and restoration workshops. |
|
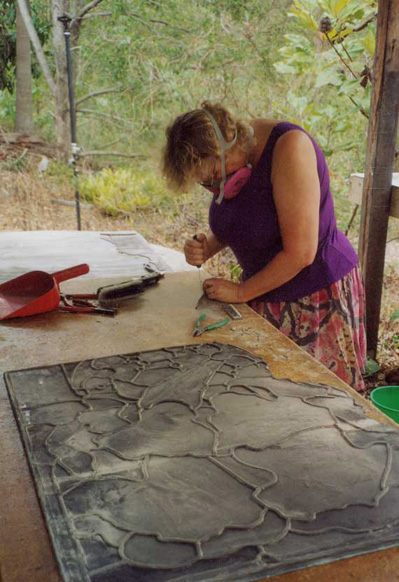
10. PUTTYING
| After the window has been releaded, a proprietary brand linseed oil putty is forced into the space between the edge of the glass and the leaf of the H section of the lead. This both waterproofs and stiffens the window. It is critically important that excess putty on the surface of the glass, and particularly of glass paints, be carefully removed as the linseed oil in the putty can attack glass paints. | |
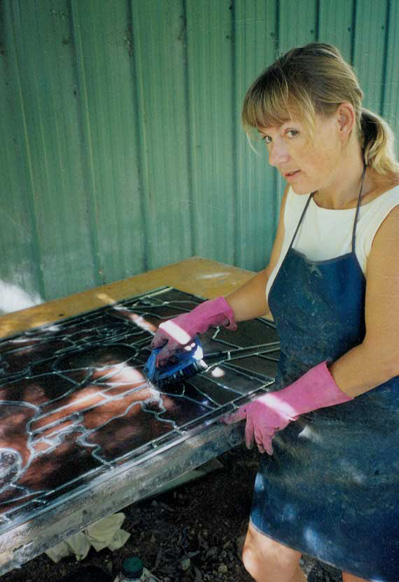 |
This photo shows the black putty being forced into the leads with a stout brush. |
11. REINSTALLATION
The window is reinstalled. Where correct stained glass fitting conventions were originally used, the window is reinstalled in exactly the same manner. Where windows were not correctly installed the window is reinstalled using correct conventions unless there are compelling reasons not to do so. |
|
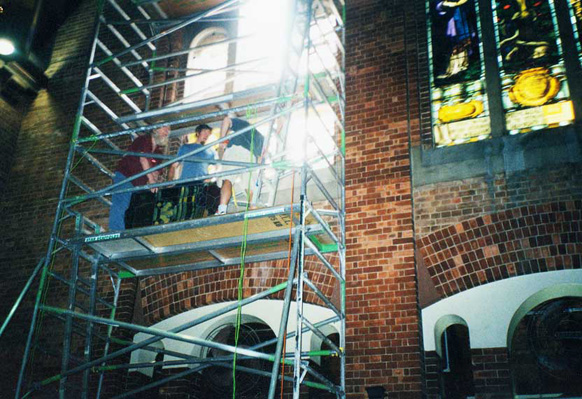 |
This photo shows the reinstallation of the fabulous 1922 Brooks Robinson Studio windows at St Andrew’s Uniting Church, Brisbane which Gerry and Jill restored in recent years. |
| At the conclusion of the work the custodian is presented with a written and photographic report on the works that have been undertaken, along with a list of materials used. | |
![]()